How to Track a new Email with Tracking URLs?
Tagging every link in an email newsletter one-by-one is slow and a common source of tracking errors. Default tracking from email service providers (ESPs) is often minimal and doesn't follow your company's specific analytic rules.
The Track a new Email feature solves this. It scans your email's HTML, finds all the links, and lets you apply consistent tracking parameters to all of them in one step.
This article guides you through the process from start to finish.
Step 1: Compose Your Email and Get the HTML
First, create your email in your preferred email service provider (ESP), such as Mailchimp, ConstantContact, Aweber, etc.
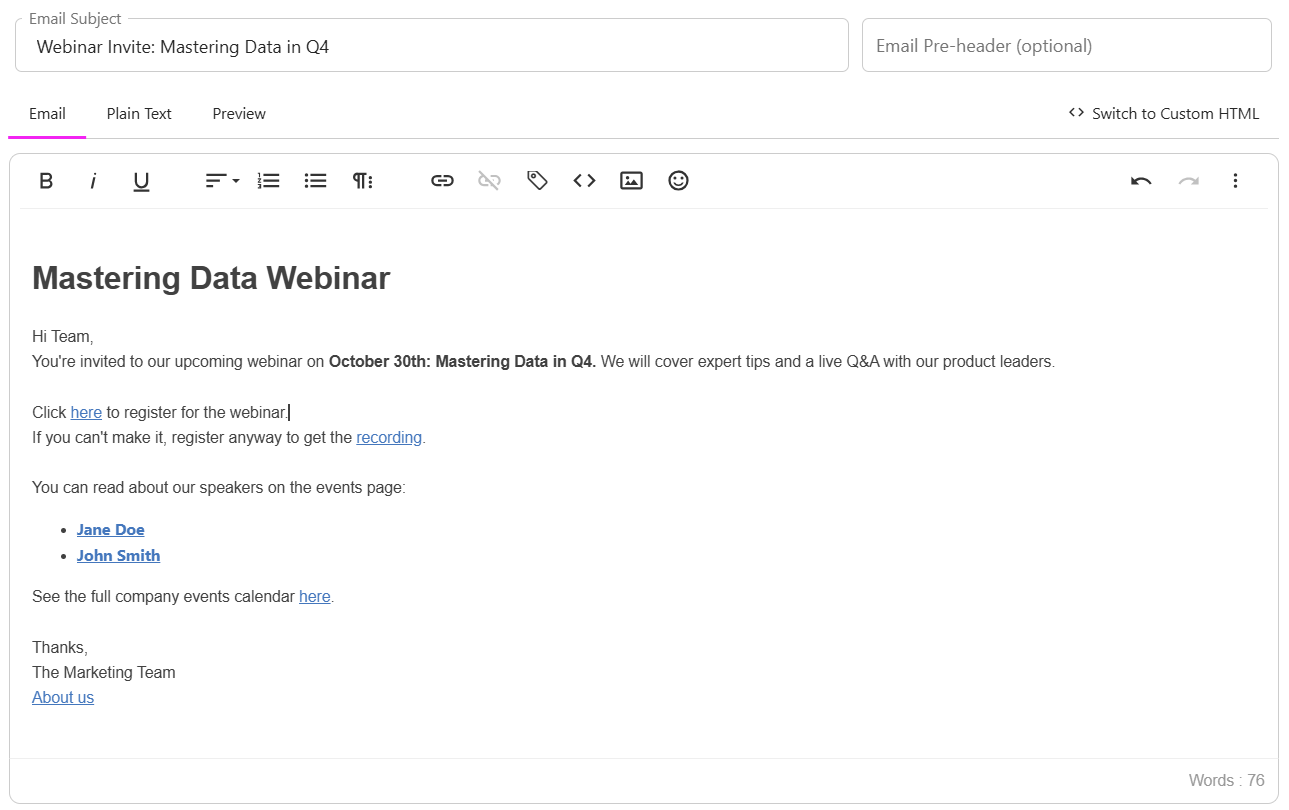
- Compose your email and add all your links (e.g., https://www.example.com/products) without any UTM parameters.
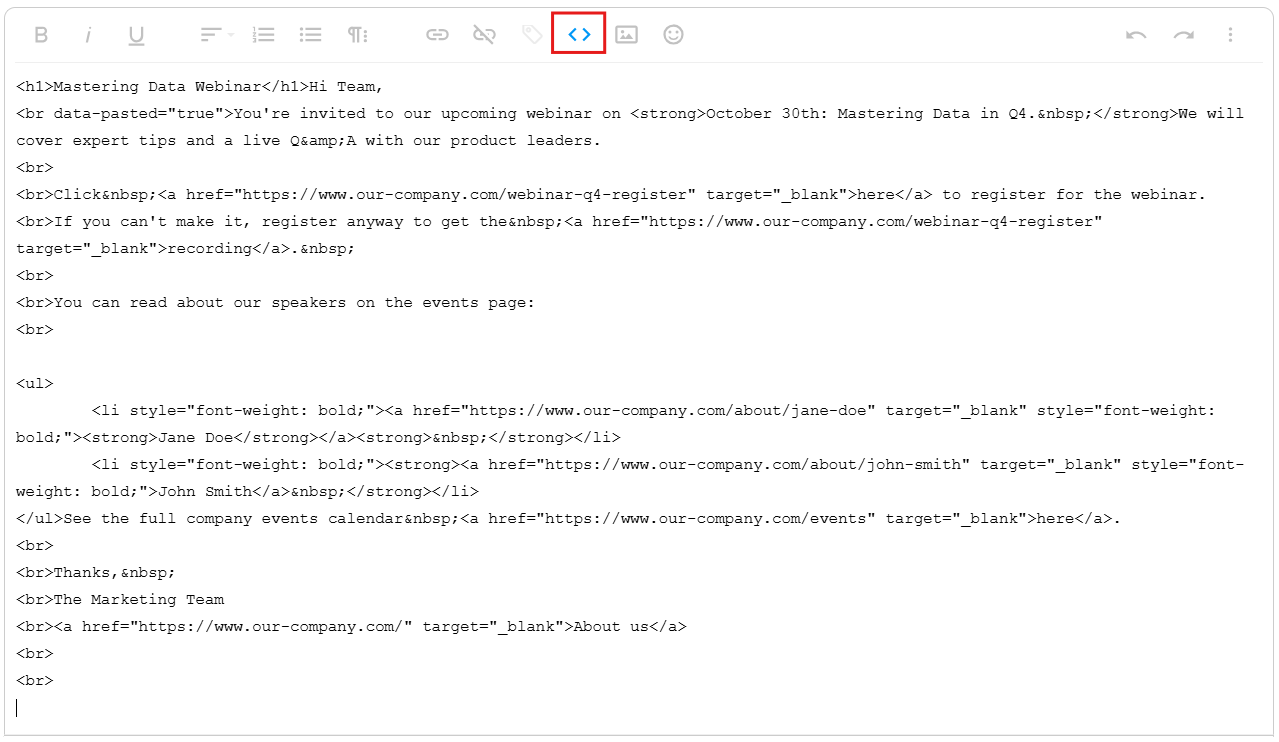
- Once finished, you must get the final HTML code. In your email editor, look for a button to view the source code. This button often looks like <> or is labeled Source.
- Click this button to see the complete HTML.
- Select all of this code (Ctrl+A or Cmd+A) and copy it to your clipboard (Ctrl+C or Cmd+C).
Step 2: Use the 'Track a New Email' Tool
Now, log in to your project to add the tracking.

- From the main project navigation, click the Emails tab.
- Click the Track a new Email button.
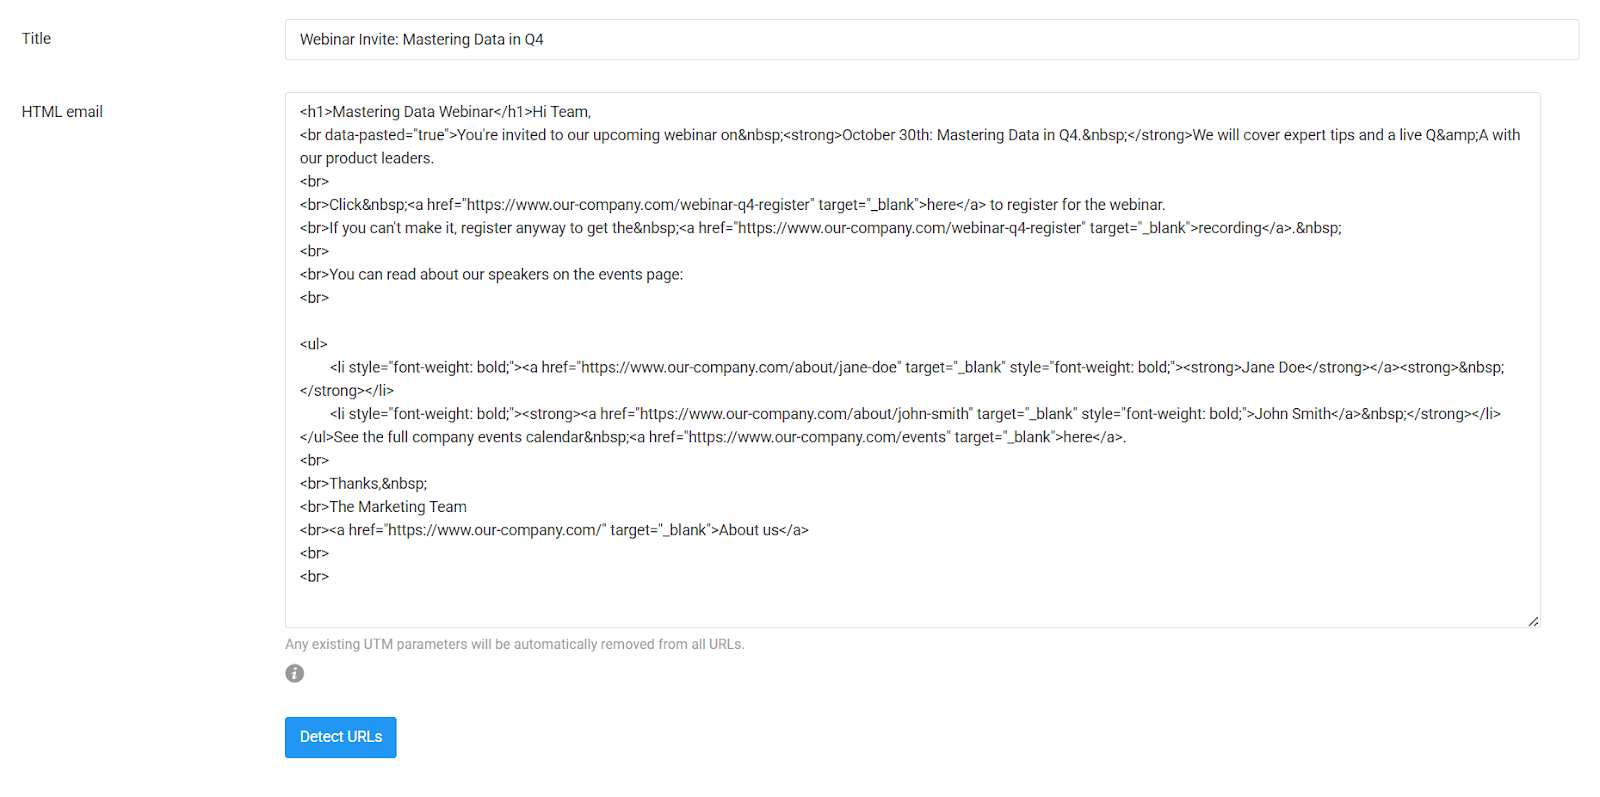
- In the Title field, enter the name of your email (e.g., "Webinar Invite: Mastering Data in Q4").
- Paste the HTML code you copied from your ESP into the HTML email field.
- Click the Detect URLs button.
Step 3: Add Your Tracking Parameters
The platform will scan your HTML and display a list of all the unique links it found.
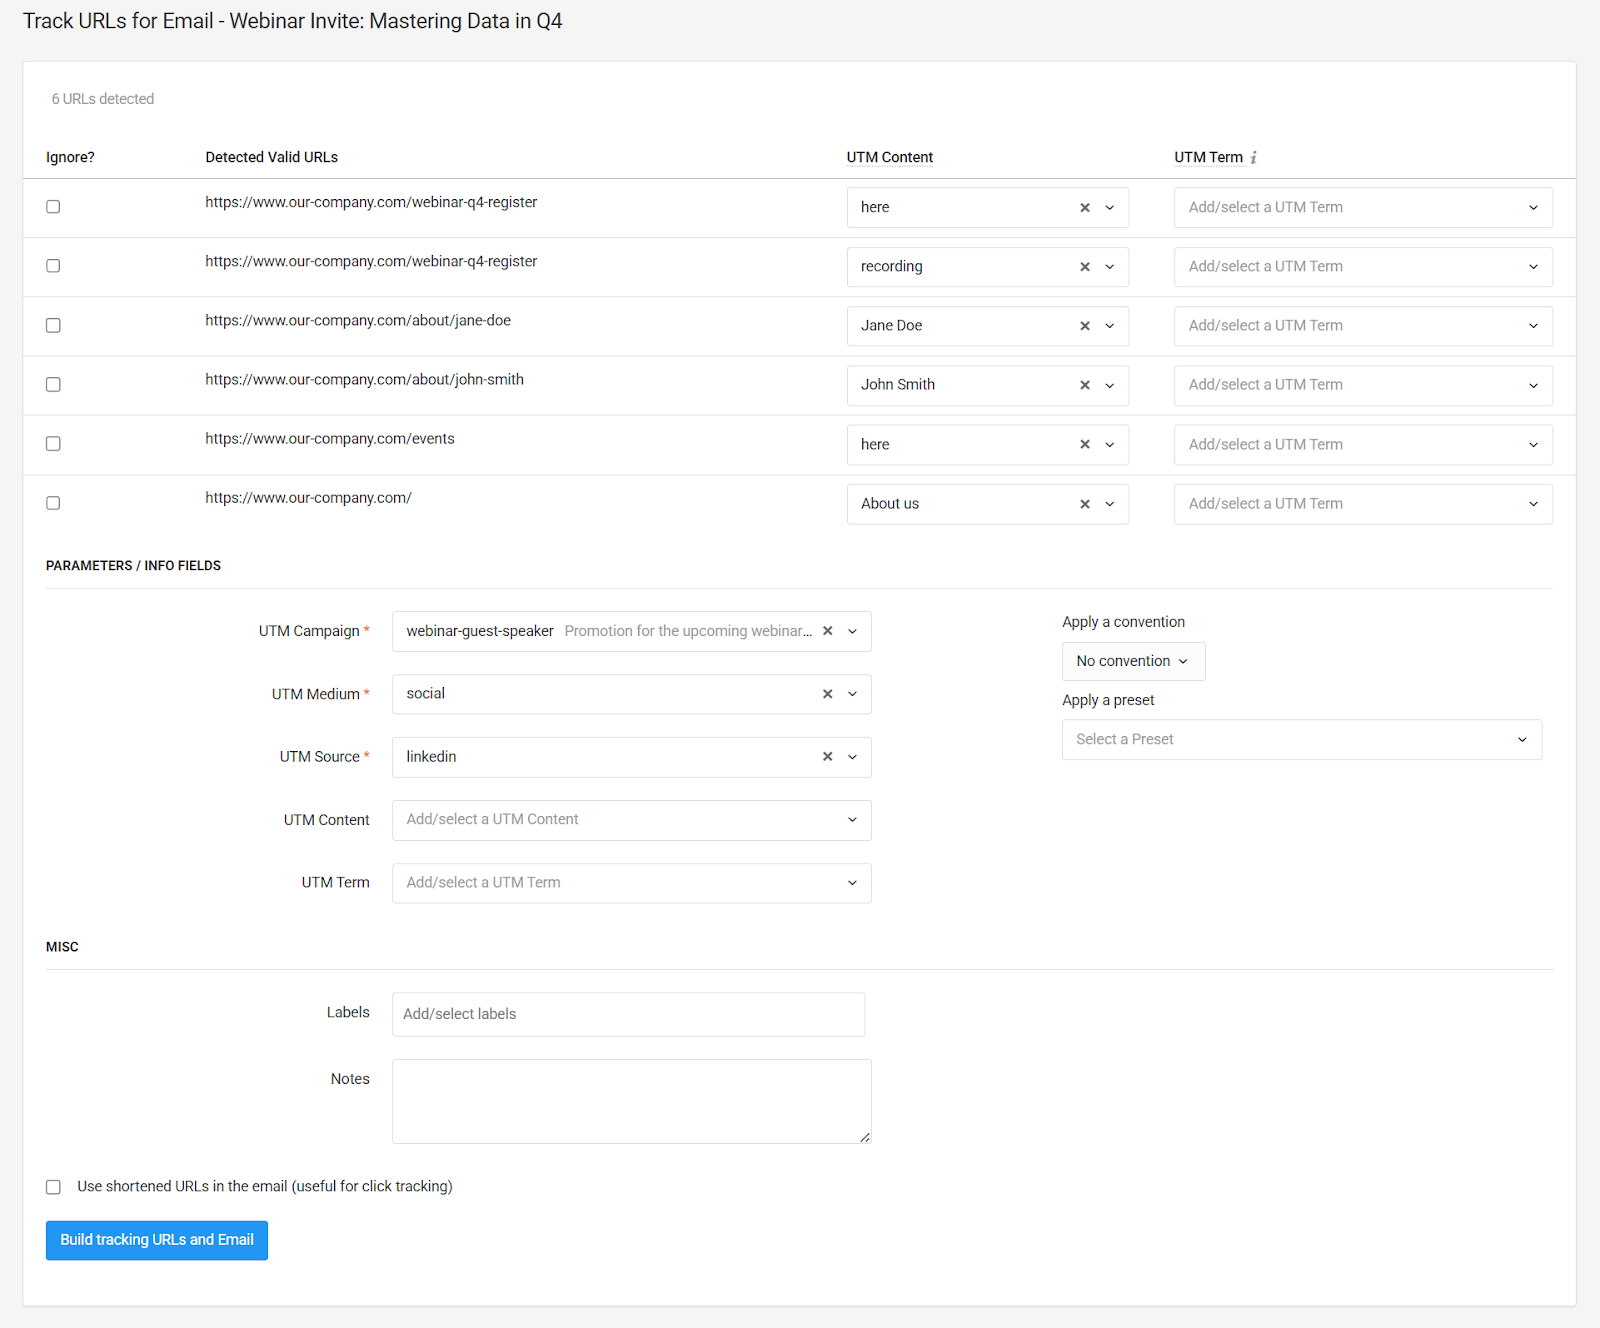
- Below the list of links, fill in the tracking parameters you want to apply, such as UTM Campaign, UTM Source, and UTM Medium.
- You can select which links to ignore to track by checking the boxes before each URL.
- Once your parameters are set and your links are selected, click Build tracking URLs and Email.
Step 4: Paste the Tracked HTML Back into Your ESP
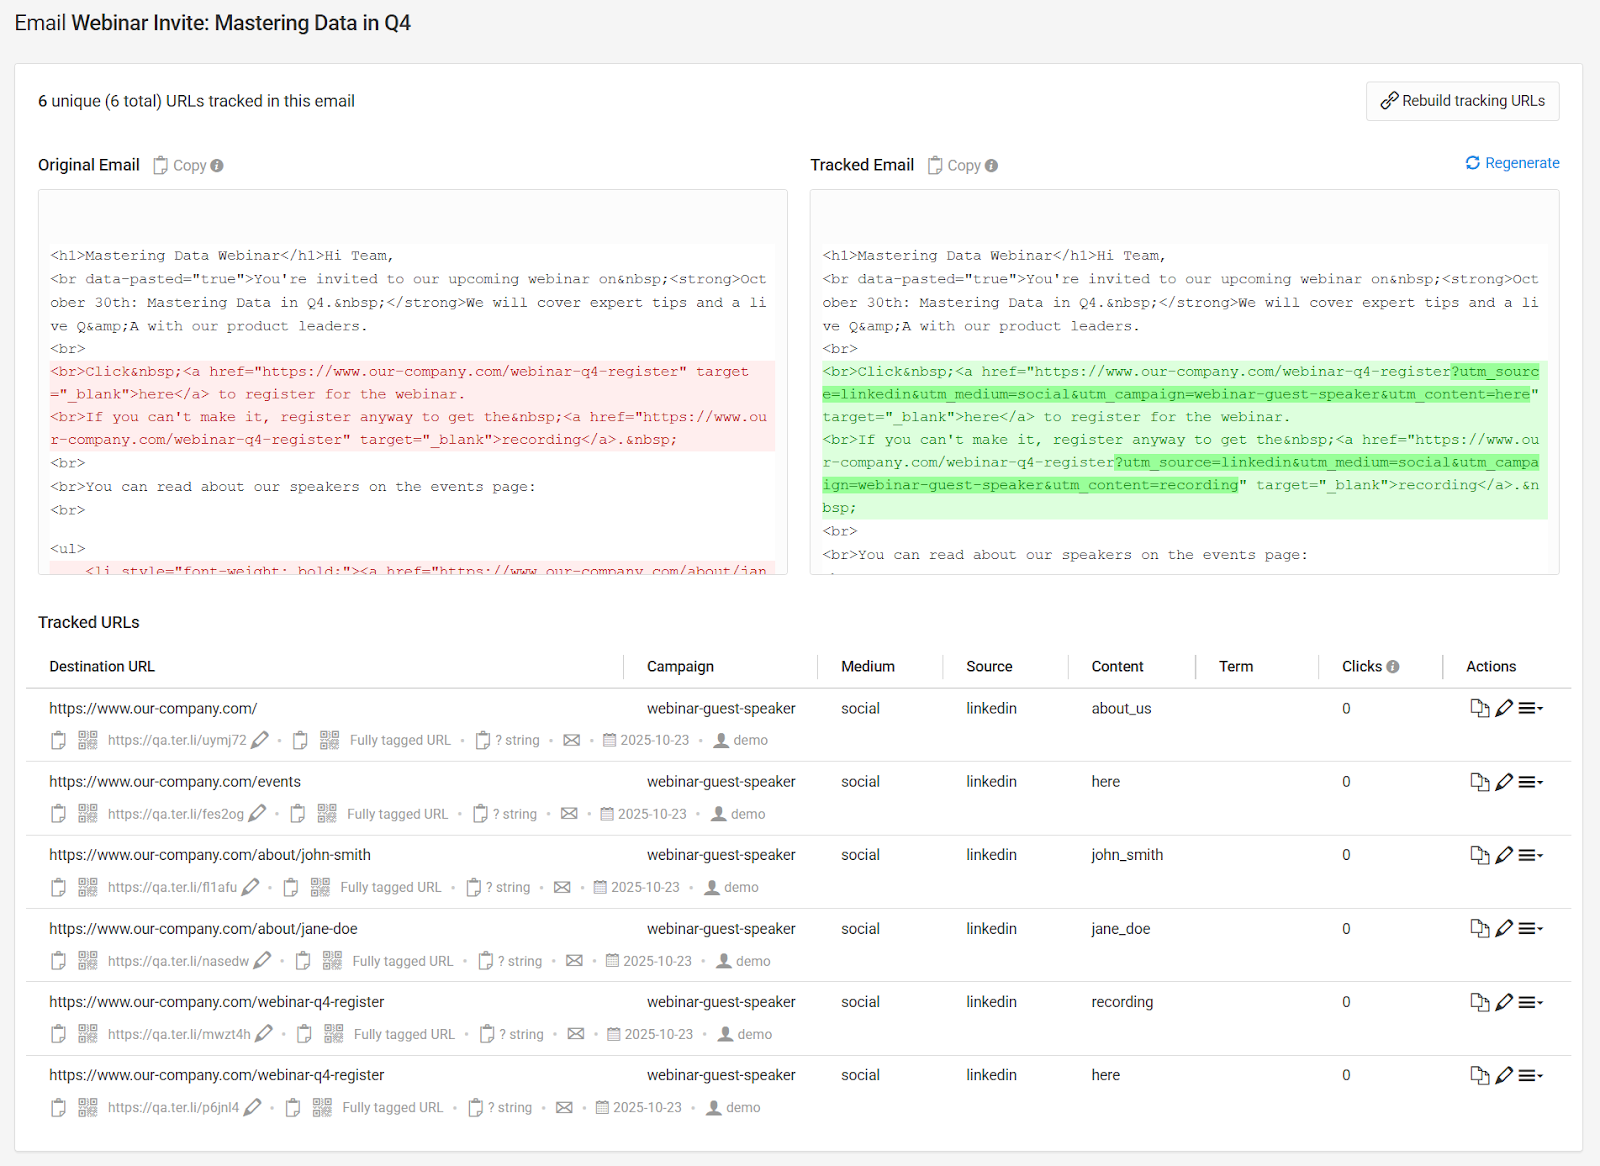
The platform will instantly create all the new tracking links and inject them into your email's HTML code, replacing the original, non-tracked links.
- Click the Copy button to copy this new, fully-tracked HTML.
- Go back to your email service provider (Mailchimp, Aweber, etc.).
- Open the same HTML or <> source code view you used in Step 1.
- Delete the old code and paste in the new, tracked code from the platform.
That's it. Your email is now ready to send with every link correctly and consistently tagged for your analytics.
Best Practices
- Use Presets: This workflow is ideal for Presets. You can select a saved Preset (e.g., "Weekly Newsletter") to populate all your UTM fields with one click, guaranteeing consistency every time.
- Use Conventions: If your project has Conventions enabled, the parameter fields will use your predefined dropdowns and rules to prevent typos and enforce your tracking rules.
- Skip Internal Links: It is highly recommended to check links you don't want to track as part of your campaign. This includes links like unsubscribe, manage preferences, or view in browser.
Why Use This Tool?
While ESPs can add some parameters, they don't ensure consistency across your entire team or all your campaigns. This tool allows you to enforce your Conventions and makes using Presets simple, which is essential for accurate and reliable analytics.