Get the most out of Terminus - Set up your Account
Welcome to Terminus!
To help you configure your account correctly and unlock the full potential of the platform, your dashboard features a "Get the Most Out of Terminus" setup checklist.
This guide walks you through the dynamic setup process to ensure your workspace is ready for action.
A Dynamic Checklist
This setup guide is a dynamic two-part process.

- Part 1: Initial Setup When you first log in, you will be presented with 3 essential steps to get your account off the ground, as shown in the progress bar (0 of 3).
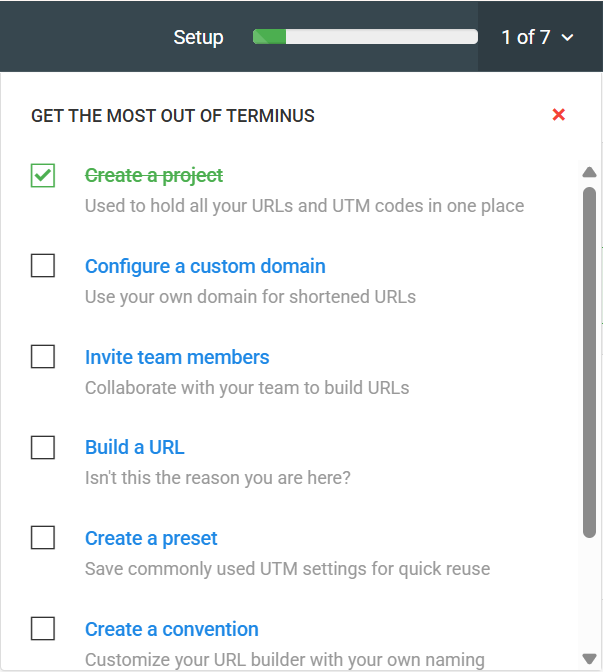
- Part 2: Account Configuration Once you complete the first step ("Create a project"), the checklist will expand to show the remaining 4 steps, bringing the total to 7. This expanded list includes more advanced configurations.
Phase 1: The Essentials
1. Create a Project
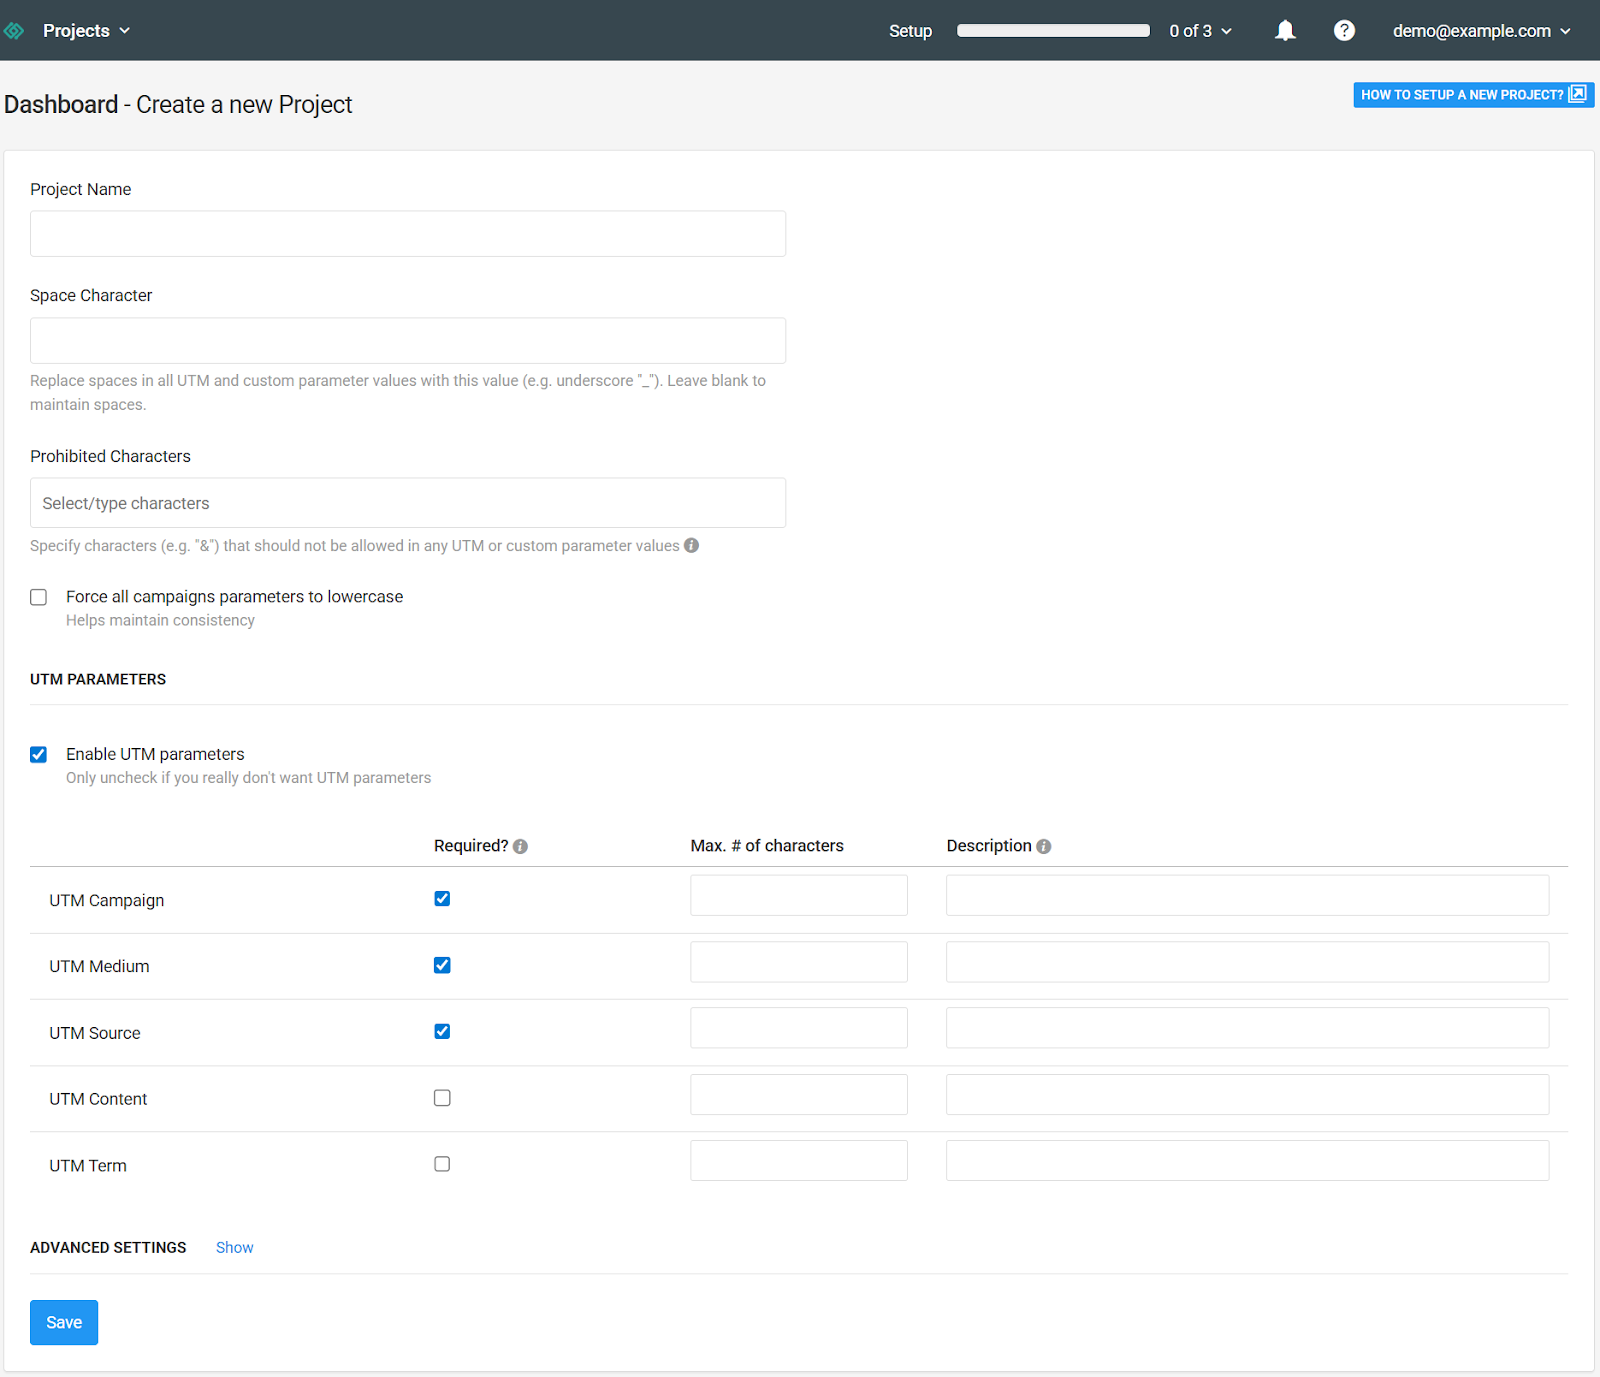
This is your first and most critical step. A Project acts as the central container for your work, holding all your URLs, UTM codes, and campaign data in one organized place. Without a project, you cannot generate tracking links.
We recommend organizing projects by department (e.g., Marketing, Sales) or by specific product lines to keep your data clean. If you are unsure how to structure this, you can follow our guide on how to set up a new project or click the HOW TO SET UP A NEW PROJECT? at the top of the dashboard to build a solid foundation.
2. Configure a Custom Domain
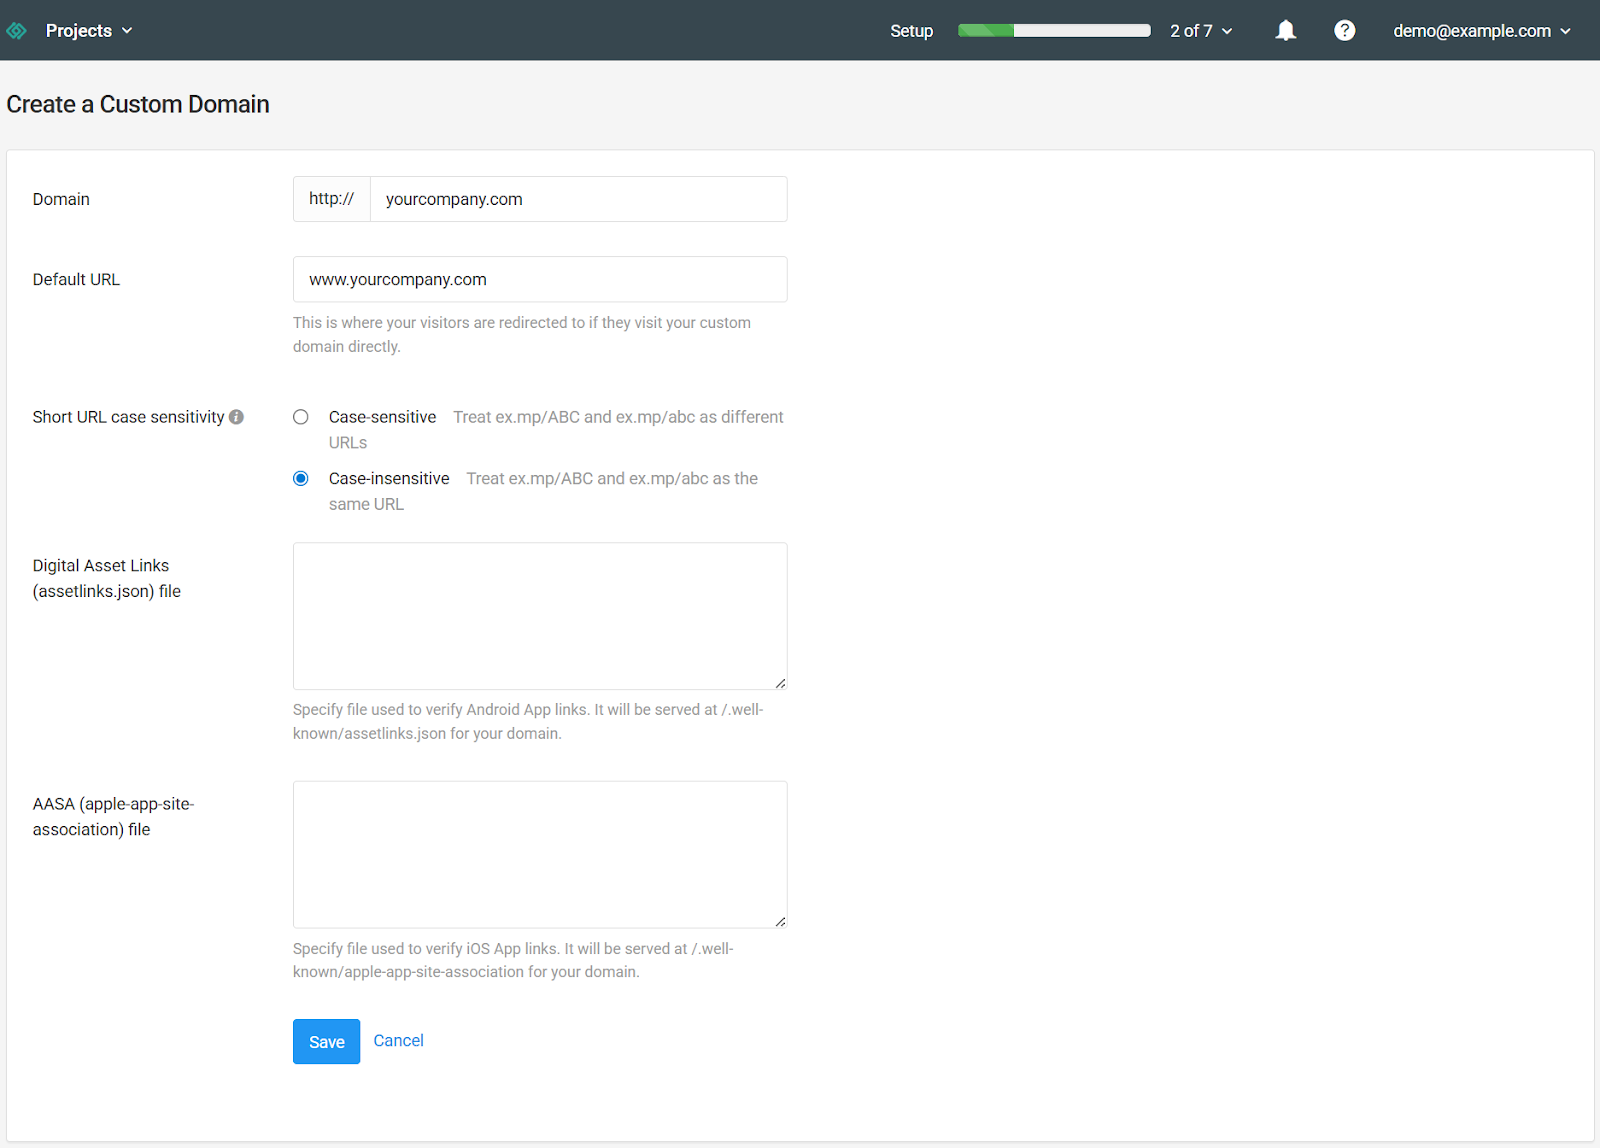
While this step is optional, we highly recommend completing it early. Configuring a custom domain allows you to use your own branded domain (e.g., links.yourcompany.com) for all your shortened URLs.
Branded links build trust with your audience and typically see higher click-through rates. For a walkthrough on technical requirements and setup, please read our article on configuring custom domains.
3. Invite Team Members
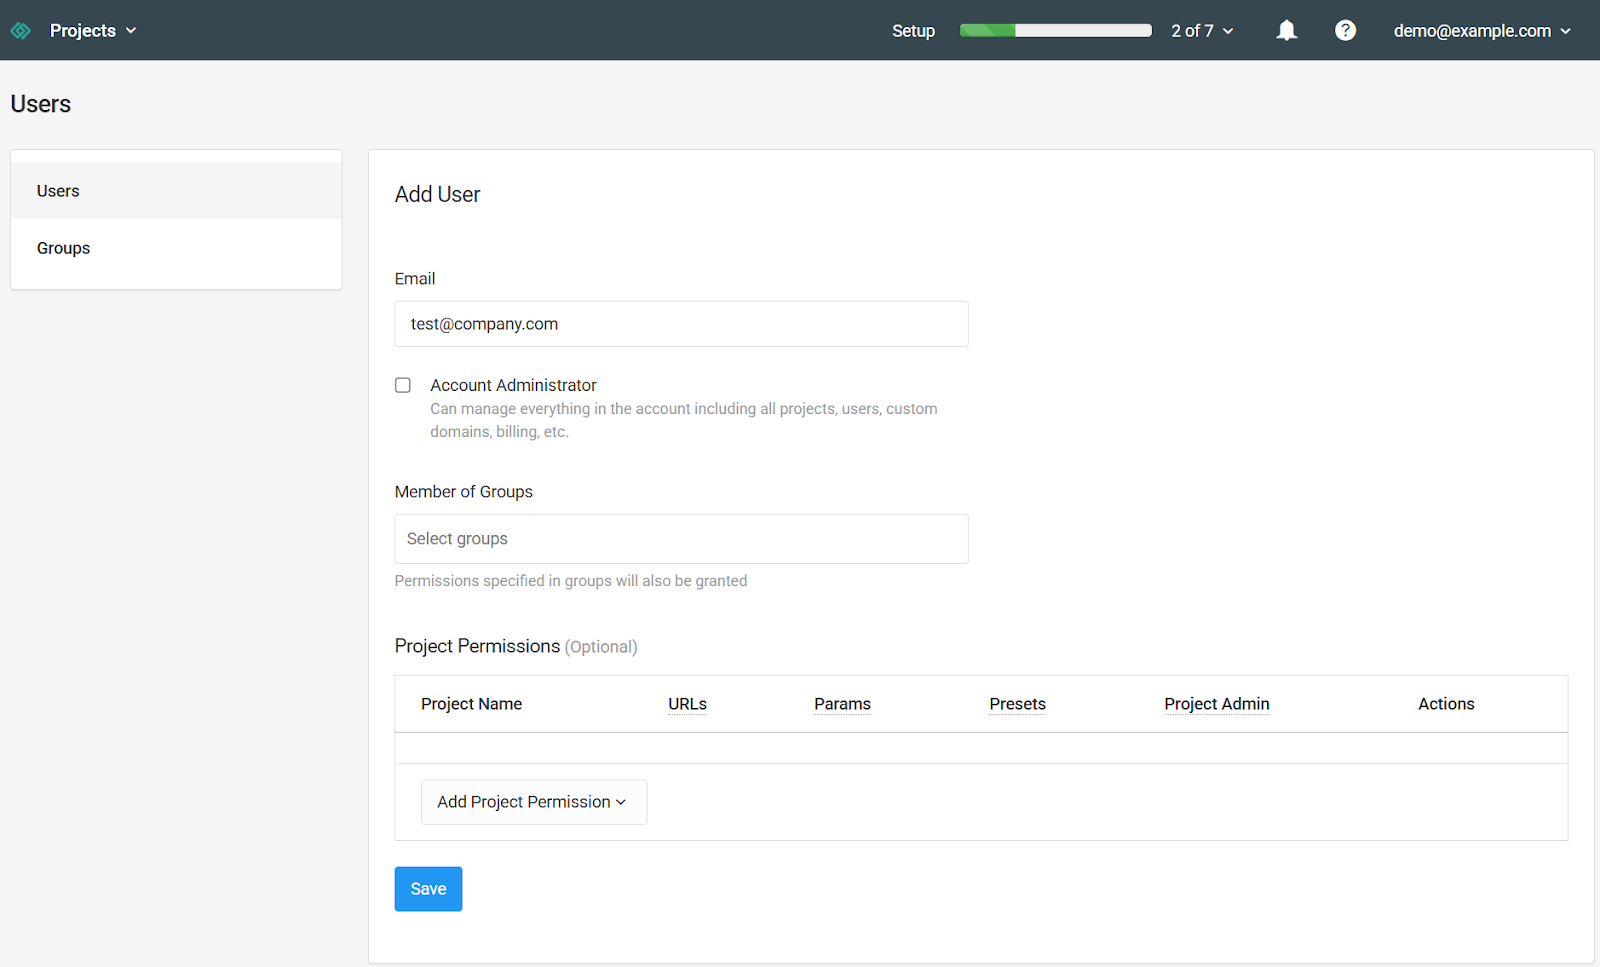
Terminus is built for collaboration. This step ensures your colleagues can join your workspace to build URLs, manage projects, and analyze data alongside you. You can assign different roles to control access levels across the account.
You can grant specific access levels to different members of your organization. To learn how to add people to your project and trigger their invitation emails, review our guide on how to manage users and permissions.
Once you have sent the invites, your team should receive an email to join. If anyone is having trouble receiving their access link, you can review our steps for troubleshooting user invitation emails.
Phase 2: Advanced Configuration
These steps appear on your checklist automatically after you have created your first project.
4. Build a URL
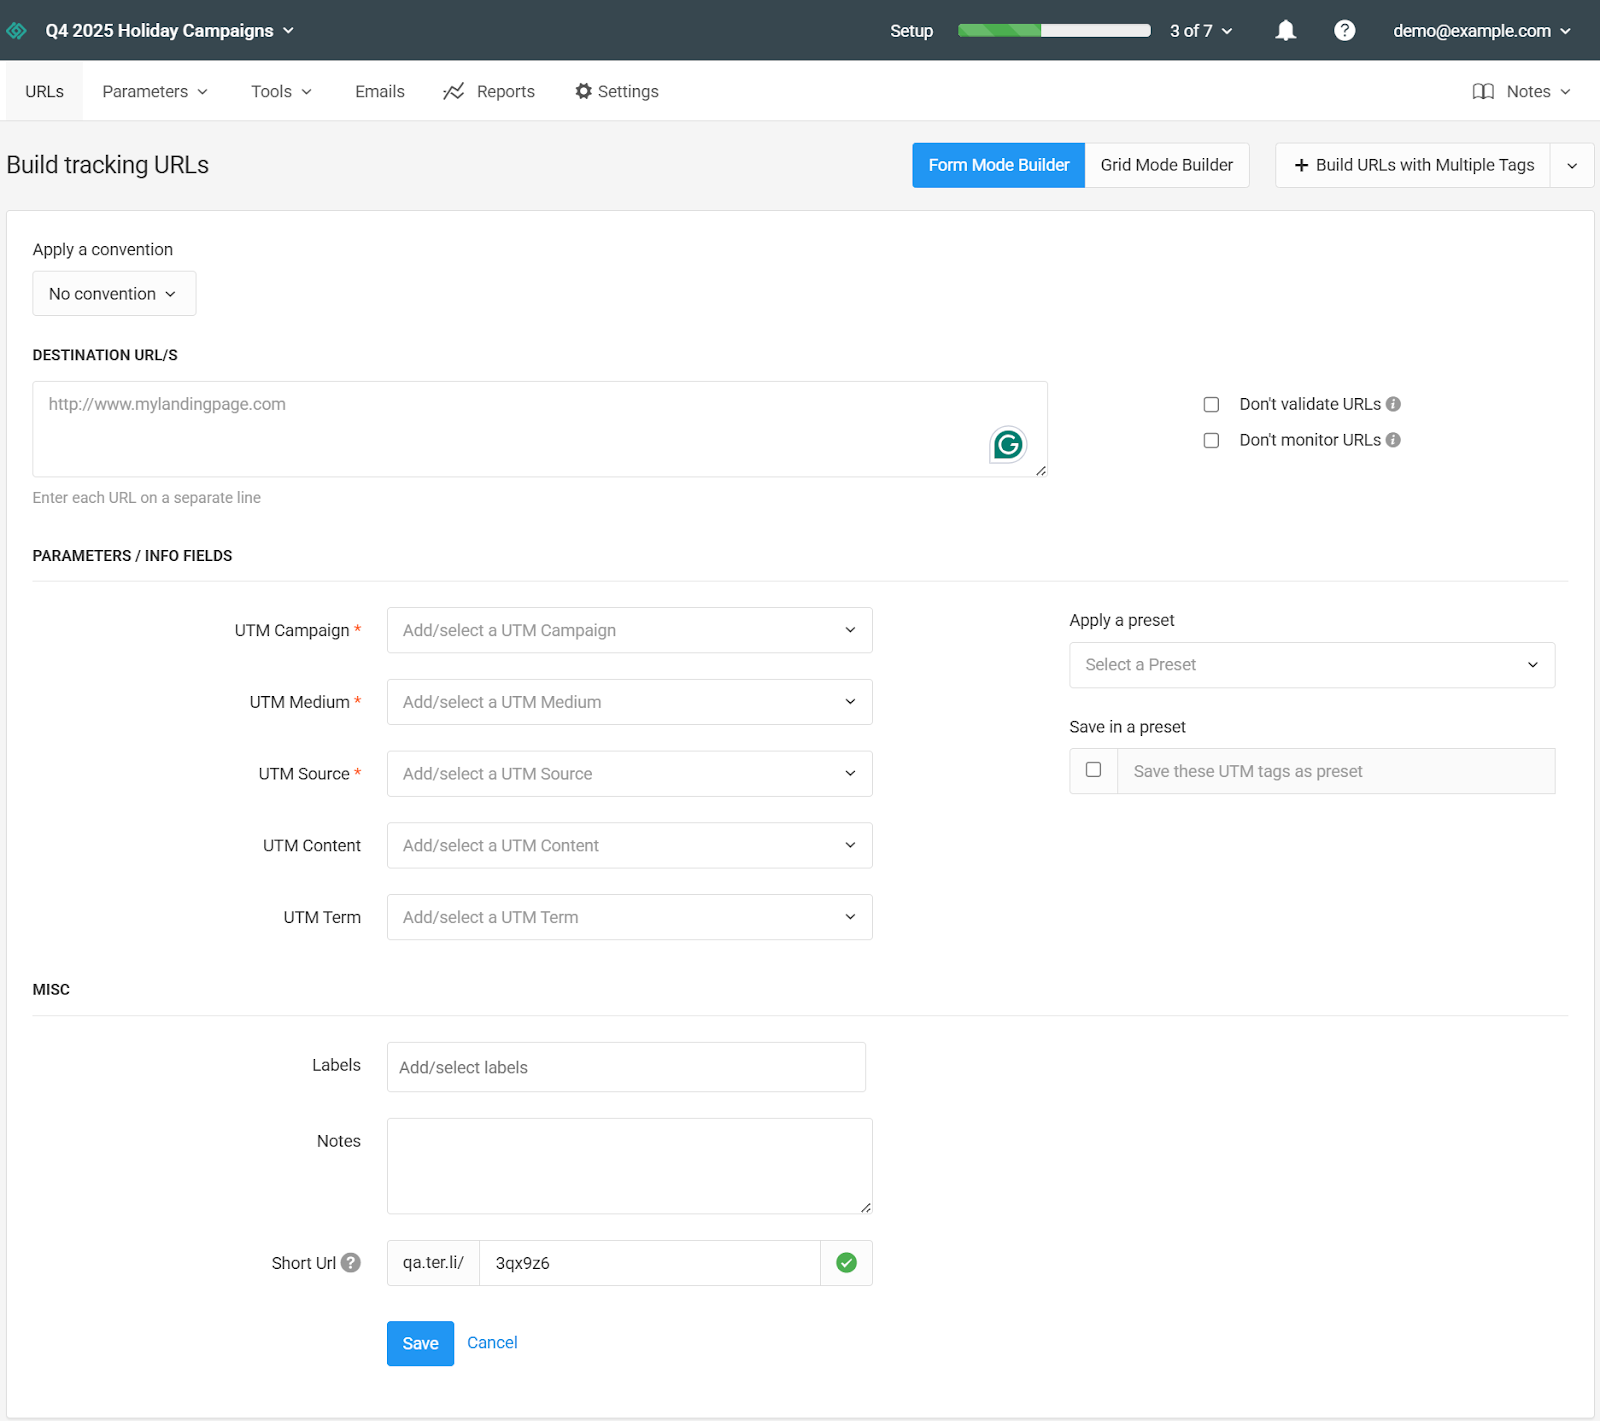
Now that your foundation is set, it is time to create your first fully tagged tracking link. This process involves inputting your destination URL and applying UTM parameters to ensure you know exactly where your traffic is coming from.
The builder is designed to be intuitive, but it offers powerful options for customization. To walk through the entire creation flow, check out our guide on how to build a URL.
5. Create a Preset
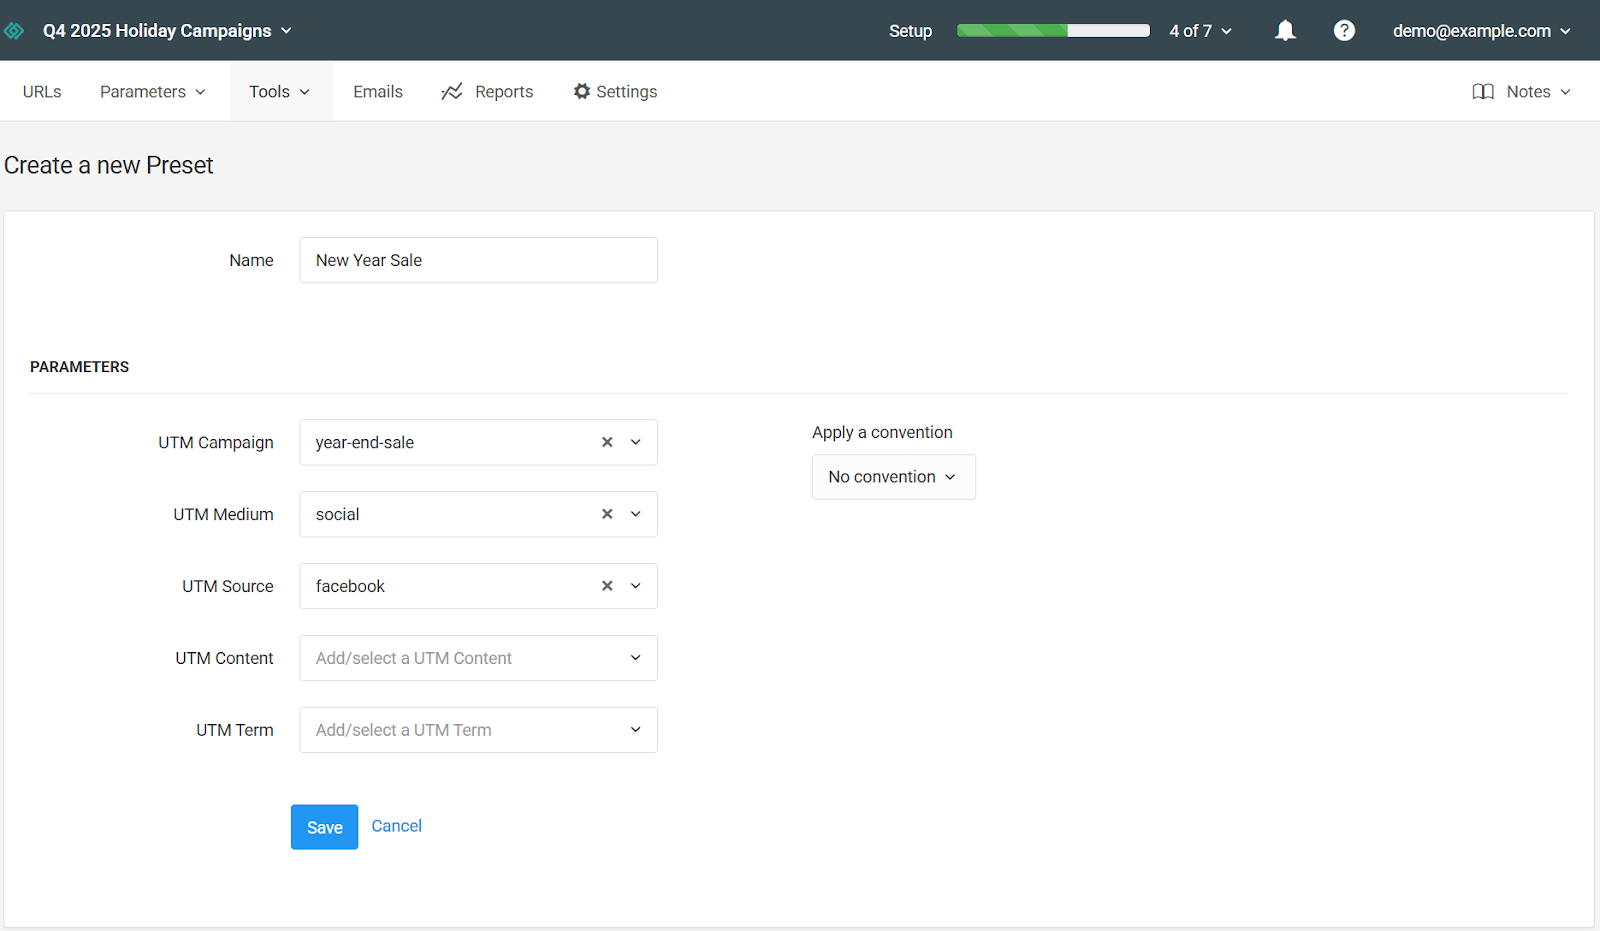
Presets are a massive time-saver for anyone running recurring campaigns. They allow you to save a specific combination of UTM settings, such as a standard setup for "LinkedIn Social" or "Weekly Newsletter" so you can apply them with a single click in the future.
By using Presets, you reduce manual data entry and minimize the risk of typos. Learn how to speed up your workflow by creating and managing presets.
6. Create a Convention
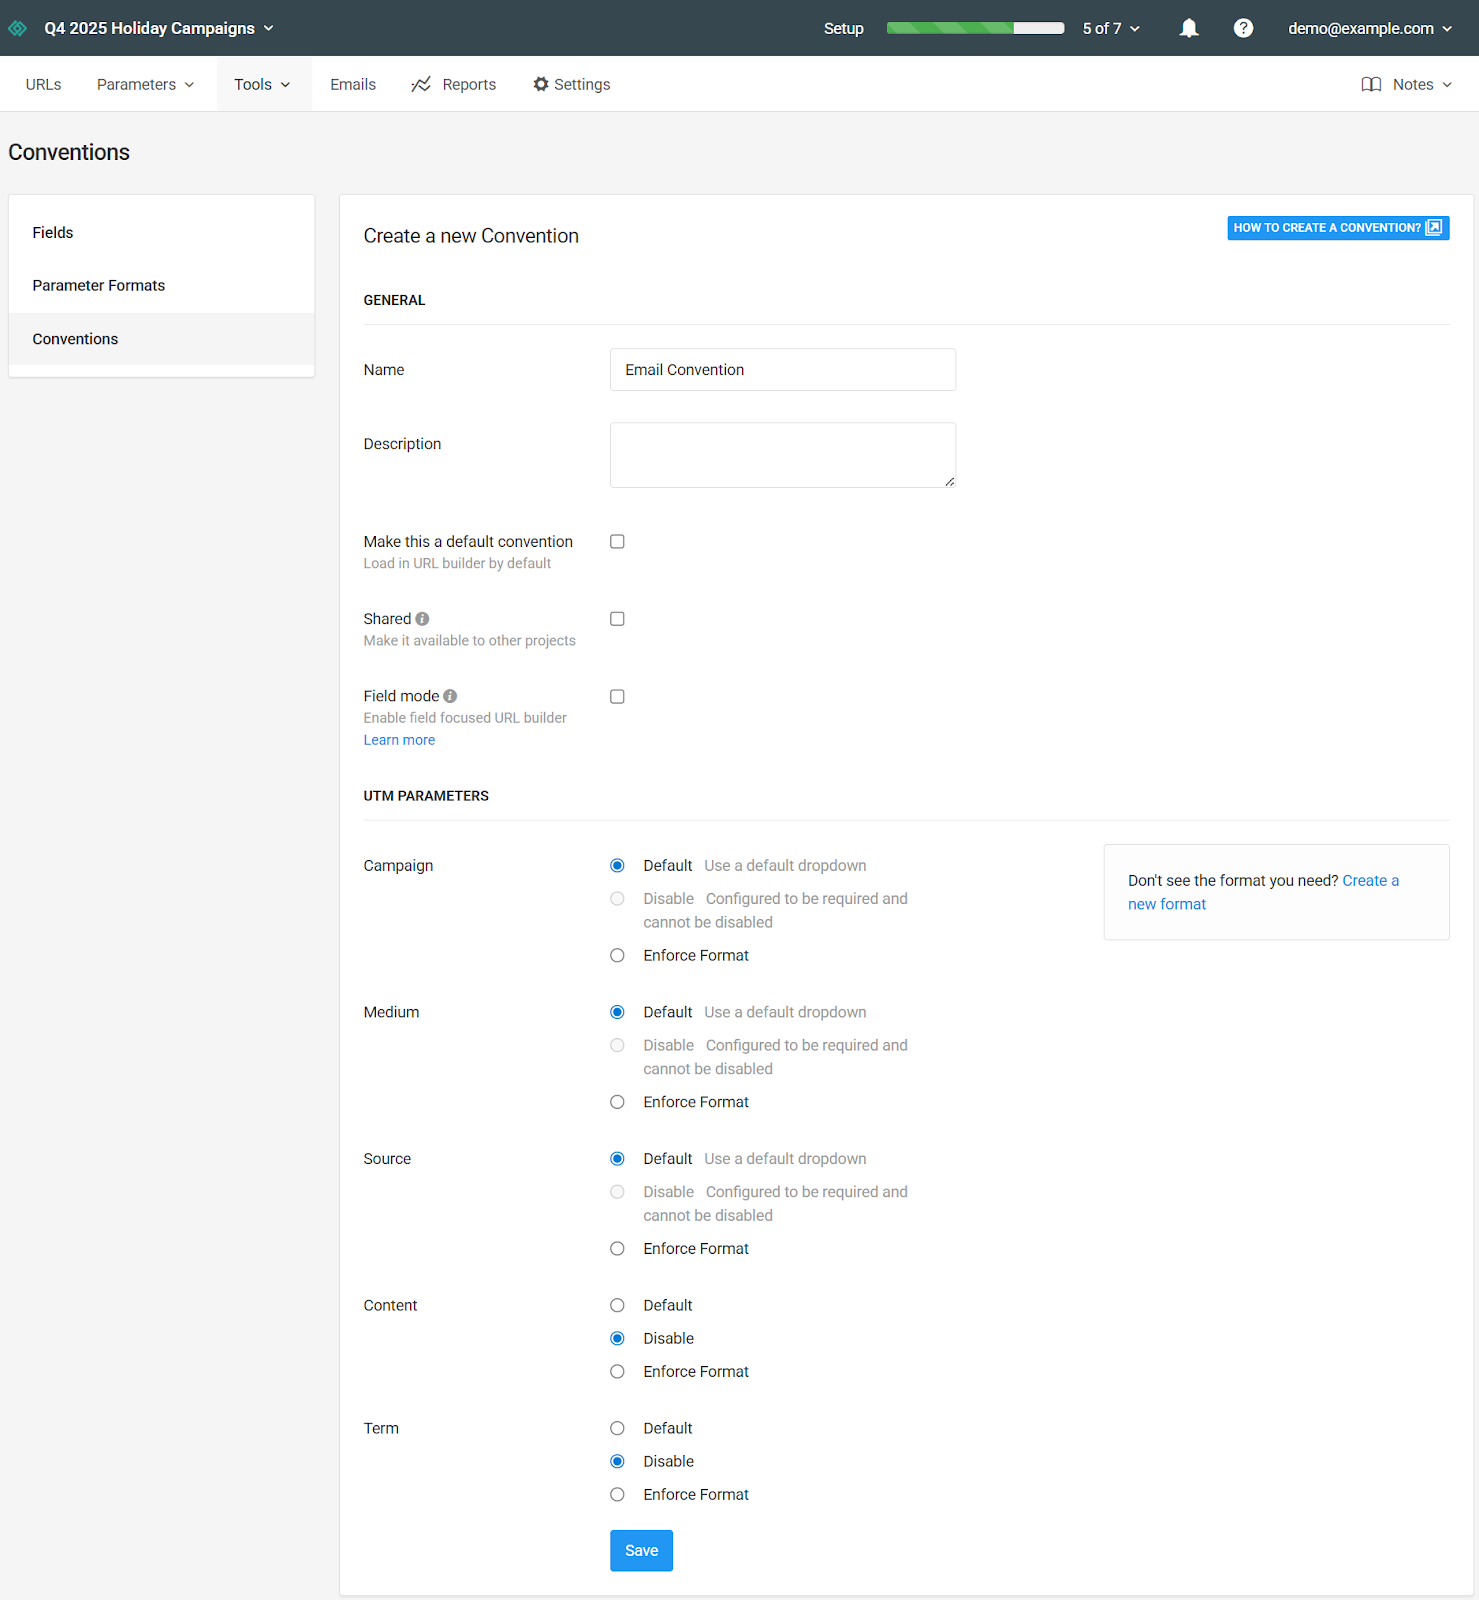
As your team grows, maintaining data hygiene becomes a challenge. Conventions solve this by letting you enforce specific naming rules and dropdown menus in the URL builder. This prevents fragmentation, such as having one person use "facebook" and another use "fb."
Conventions ensure that every link created by your team adheres to a strict standard, making your analytics much more accurate. You can learn how to define these rules in our guide to create and manage conventions or simply click the HOW TO CREATE A CONVENTION? button at the top of the dashboard.
7. Track URLs in an Email
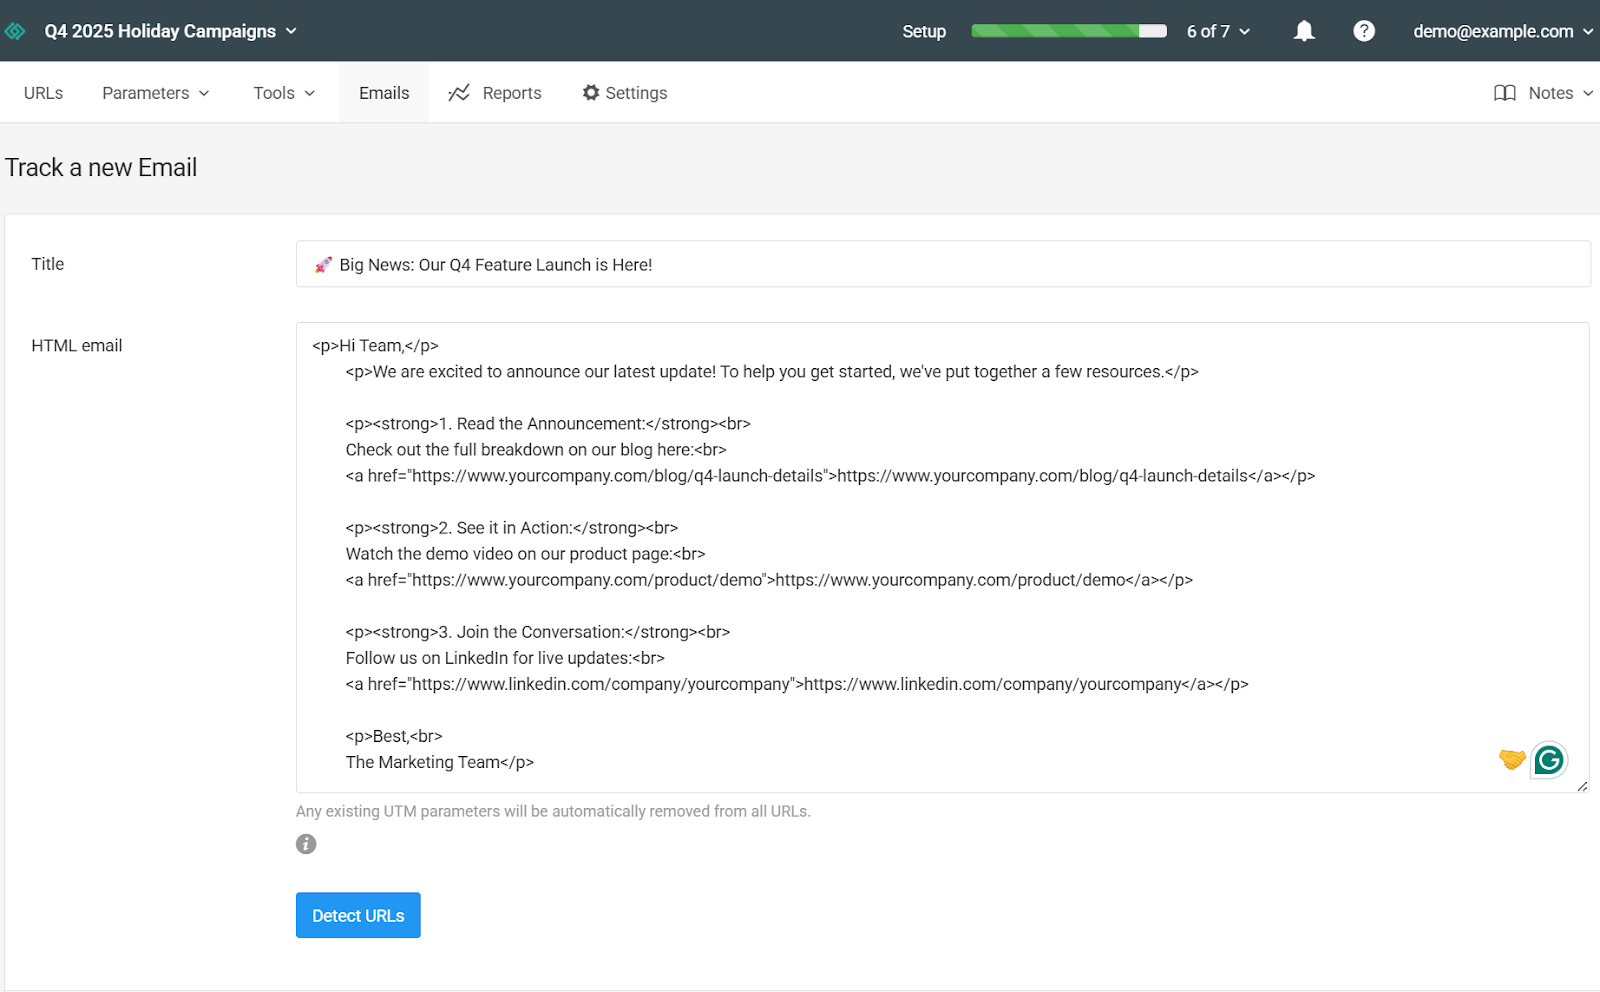
Email campaigns often contain multiple links; to your blog, product pages, and social profiles. Manually tagging each one is tedious and prone to error. This step helps you apply UTM tracking to all URLs in your emails efficiently.
By standardizing tracking across your email communications, you gain clearer insights into which specific emails or links are driving conversions, allowing you to optimize your emailing strategy effectively. For detailed instructions, read our guide on how to track emails with tracking URLs.
Best Practices for Account Setup
- Plan your Projects: Think of Projects as folders or workspaces. You might create separate projects for different departments (e.g., "Marketing," "Sales") or different product lines.
- Standardize Naming Early: Whether it’s Project names (e.g., [Dept] - [Campaign]) or UTM parameters, establishing a naming convention before you invite the whole team prevents messy data later.
- Test Your Domain: If you set up a Custom Domain, always create a test link and click it yourself to ensure the DNS records have propagated correctly before launching a live campaign.
- Limit Admin Access: When inviting team members, give them only the permissions they need (e.g., "Editor" or "Admin") to prevent accidental changes to critical account settings like API keys or billing.
- Use Presets for Consistency: Don't rely on memory. Create Presets for your most common traffic sources immediately so new team members don't have to guess which UTMs to use.