How to Build Tracking URLs Using the Form Mode Builder?
Building tracking links manually often leads to typos and inconsistent data. The Form Mode Builder is designed to prevent these errors. It provides a simple, guided interface for creating individual links or small batches, ensuring every URL adheres to your project's tracking rules.
This builder is the default view and is perfect for creating one or more tracking URLs using a straightforward form.
Step 1: Navigate to the Builder and Set Up

- From the main navigation, select your Project.
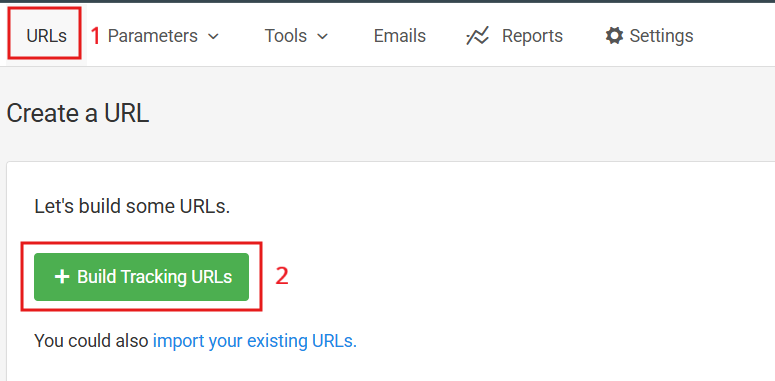
- Go to the URLs section.
- Click the Build Tracking URL button. You will land on the Form Mode Builder by default.
Step 2: Apply a Convention (Optional but Recommended)

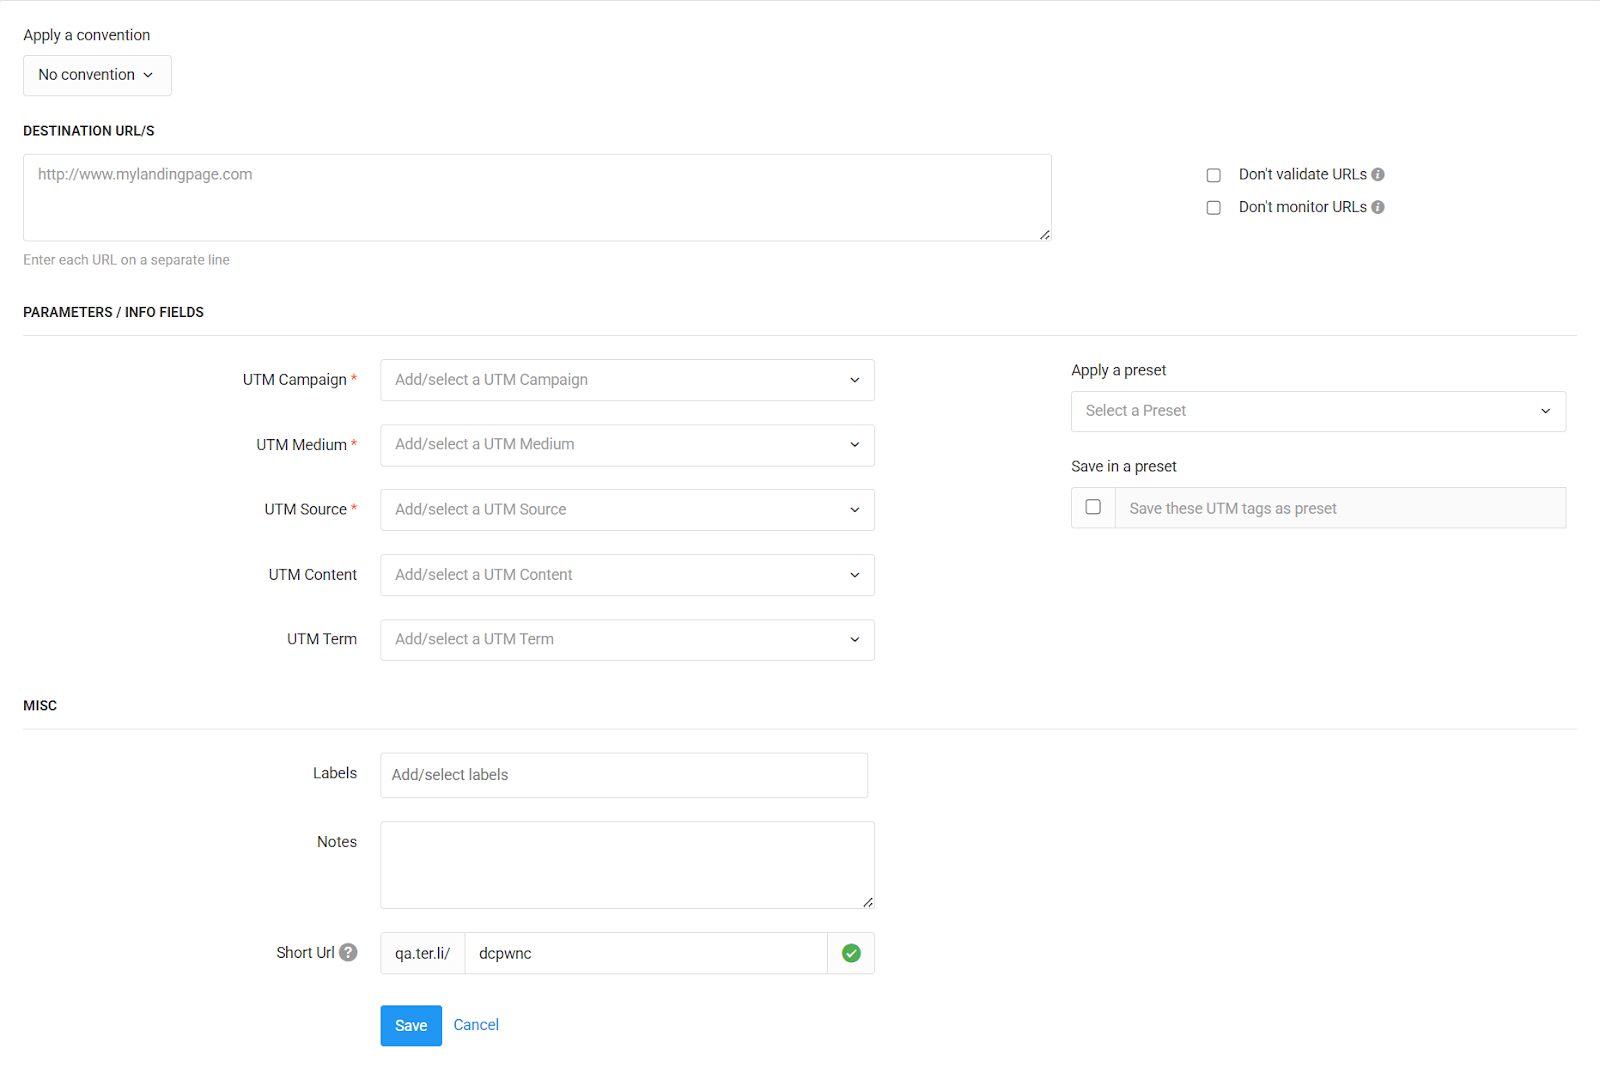
At the top of the form, you'll see an Apply a convention dropdown.
A Convention is a set of rules you've defined for your project (e.g., making utm_campaign a required field, or providing a dropdown of approved utm_source values). Applying a convention here will re-configure the form to match those rules.
To set up or edit the rules available in this dropdown, you can learn how to create and manage conventions for your builder.
Step 3: Enter Your Destination URL(s)

In the DESTINATION URL/S field, paste the full webpage URL you want users to land (e.g., https://www.yourwebsite.com/summer-sale).
Note: To create tracking links for multiple destination pages at once, you can paste each URL on a new line in this same box.
Options:
- Don't validate URLs: Check this box only if the platform incorrectly marks a valid URL as invalid. Caution: Enabling this may prevent short URLs from being created.
- Don't monitor URLs: Check this box if you do not want the platform to check if these URLs are reachable (live).
Step 4: Fill in Your UTM Parameters
Fill in the standard UTM fields. Fields marked with an asterisk (*) are required by your project's settings.

- Campaign: The name of your specific promotion (e.g., summer_sale_2024).
- Source: The source of your traffic (e.g., facebook, google, newsletter).
- Medium: The marketing channel (e.g., cpc, social_post, email).
- Content: (Optional) Differentiates links pointing to the same URL (e.g., blue_button, header_link).
- Term: (Optional) Used for paid search keywords (e.g., running_shoes).
Step 5: Use Presets to Work Faster (Optional)
On the right side of the form, you'll see options for Presets.
A Preset is a saved template of pre-filled parameters. For example, you could have a "Facebook CPC" preset that automatically fills the utm_source as facebook and the utm_medium as cpc every time. Learn how to create and manage presets in our detailed guide.
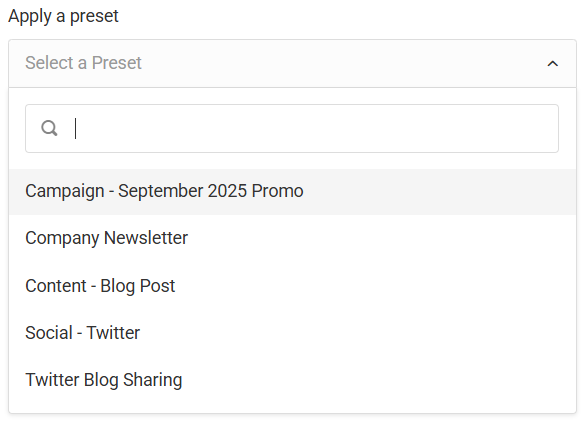
- Apply a preset: Select a saved template (e.g., "Company Newsletter") from the dropdown. This will instantly fill in fields like Source and Medium for you.

- Save in a preset: you frequently use the combination you just entered, check this box to save it as a new Preset for future use. Give it a name and it will be saved in the Presets.
Presets are a powerful way to save time and reduce errors. You can manage them for your whole team, and even group them into Preset Groups for different campaign types.
Step 6: Add Optional Details (MISC)
This section allows you to add extra data for internal organization.
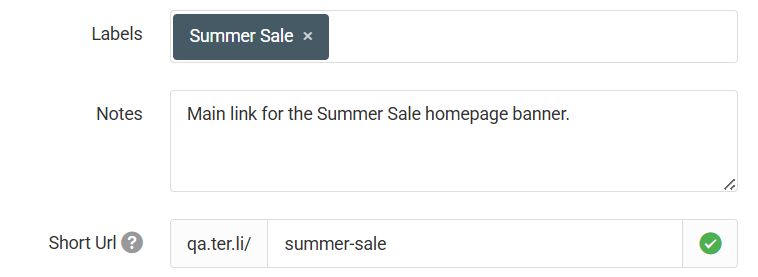
- Labels: Assign a Label (e.g., Q3_Marketing) to categorize this URL. This makes filtering your reports much easier later.
- Notes: Leave comments or context for your team about this link, such as "Link for the main banner ad."
- Short URL: A short, shareable URL for your link (e.g., qa.ter.li/3obaci) will be automatically generated. You can use this field to customize the "back-half" of a short URL (the part after the slash) to make it more branded or memorable (e.g., qa.ter.li/summer-sale).
Step 7: Save Your URL(s)
Once your fields are populated, click the Save button.
The platform will generate both:
- Fully Tagged URL: The long version with all UTMs attached.
- Short URL: The shortened, shareable version.
Both links track the same data, so you can copy and use whichever fits your channel best.
Best Practices
- Standardize Your Naming: When typing parameters manually, stick to lowercase letters and use underscores instead of spaces (e.g., summer_sale instead of Summer Sale). This prevents split data in your analytics tools.
- Test Before Sharing: Always copy your final link and paste it into an "Incognito" or "Private" browser window. This ensures the link redirects correctly and the UTM parameters appear in the address bar.
- Know When to Switch: The Form Mode is excellent for creating 1-10 links quickly. If you need to create 50+ variations for a large campaign, you will save significant time by switching to the Grid Mode Builder.
- Use Labels for Filtering: Even if you are only building one link, adding a Label (like Q4_2025) allows you to easily pull up a report of every link associated with that quarter later on.