How to use Multi-Tag builder to create URLs in bulk?
When launching a new campaign, you often need to create dozens of tracking URL variations for different sources, ads, and mediums. Building these one by one is slow and prone to errors.
The Multi-Tag Builder is a flexible and powerful tool designed specifically for this. It allows you to generate large batches of tracking links by applying many tag combinations to one or more destination URLs at once.
This guide covers the different workflows for using this builder.
Step 1: Navigate to the Multi-Tag Builder

- From the main navigation, go to the URLs section.
- Click the arrow next to the Build Tracking URL button.
- From the dropdown menu, select Build URLs with Multiple Tags.

- The Create Multiple URLs with different tags window will open
Step 2: Add Your Destination URLs
In the Destination URLs field at the top, paste one or more landing page URLs. You can add as many as you like, with one URL per line.
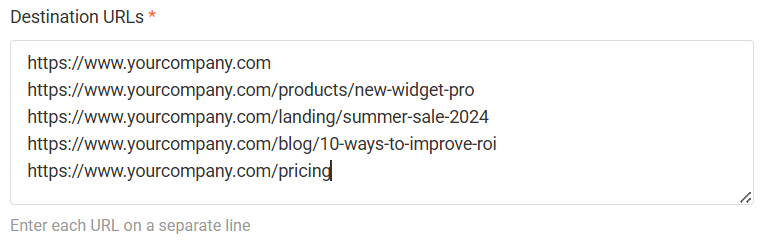
- You must enter each URL on a separate line.
- Key Point: All the tag combinations you generate in the grid (in the next steps) will be created for every Destination URL you list here.
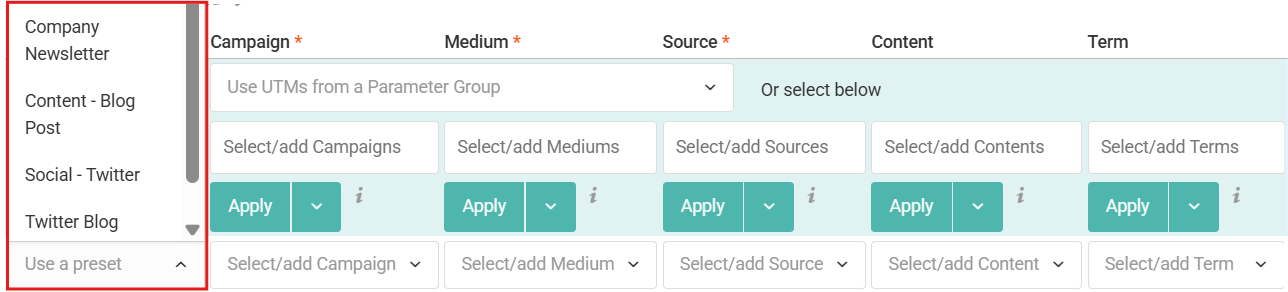
Step 3: Choose Your Workflow to Populate the Grid
This builder offers several ways to add your tracking parameters. You can even combine these workflows.
Workflow 1: Load Pre-built Rows with Presets
This is the fastest way to load complete, pre-defined sets of tracking tags.
1. To Load One Row
- In any blank row, use the Use a preset dropdown to select a single Preset (e.g., facebook_cpc_post).

- The row will instantly fill with that preset's values.
2. To Load Many Rows
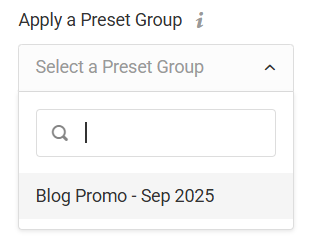
- Use the Apply a Preset Group dropdown on the top-right. Selecting a Preset Group (e.g., New Campaign Launch or Blog Promo-Sep 2025) will instantly populate the grid with all the presets saved in that group (like a row for Facebook, a row for Google Ads, and a row for your newsletter).
If you need to organize your common campaigns, you can learn how to create and use Preset Groups.
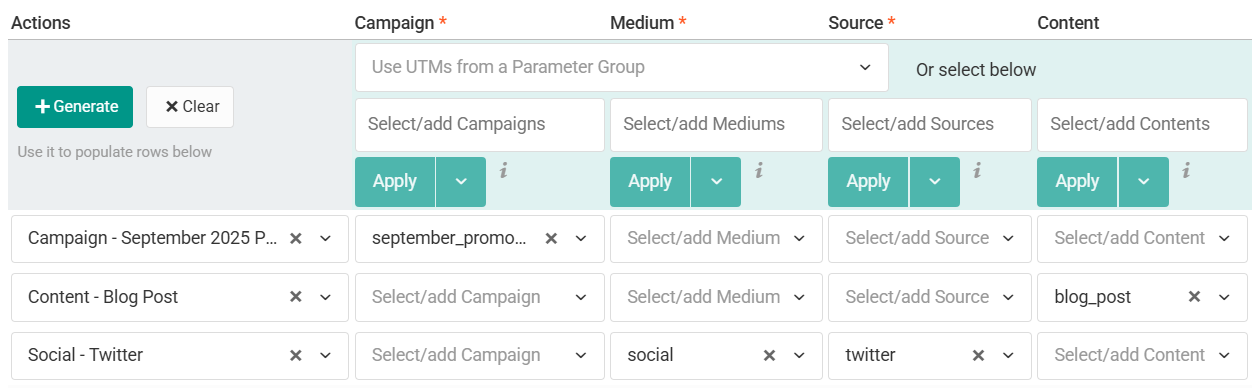
Workflow 2: Generate Combinations with the Control Row
This workflow uses the top row of the grid (the Control Row) to automatically generate all possible combinations of your parameters.
Populate the Control Row
You can do this in two ways:
1. Use a Parameter Group (Fastest)
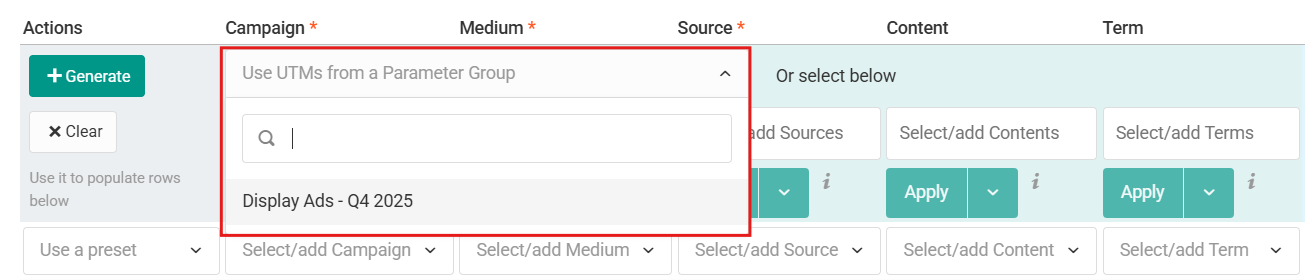
- Select a saved template from the Use UTMs from a Parameter Group dropdown. A Parameter Group (e.g., Display Ads-Q4 2025) is a saved set of values specifically for this Control Row.
2. Enter Values Manually
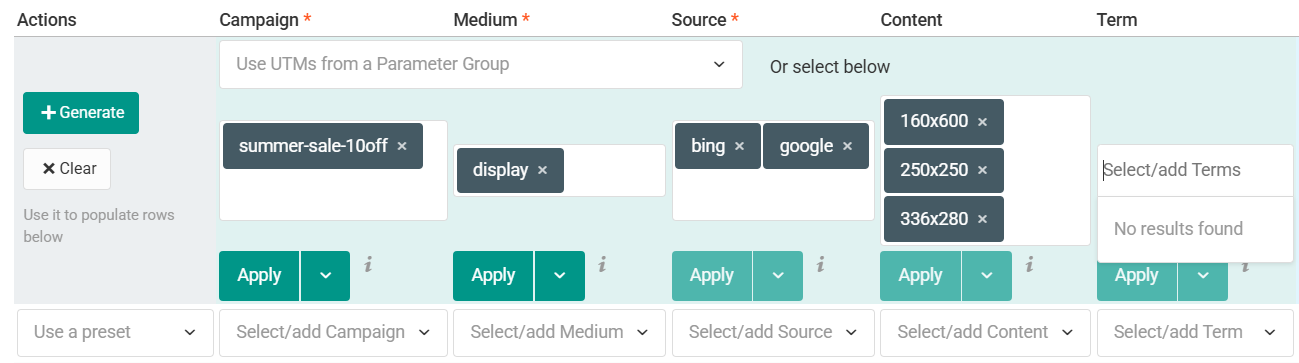
- Type or select multiple values directly into the Control Row cells. For example, you could put google and bing in the Source field, and display in the Medium field.
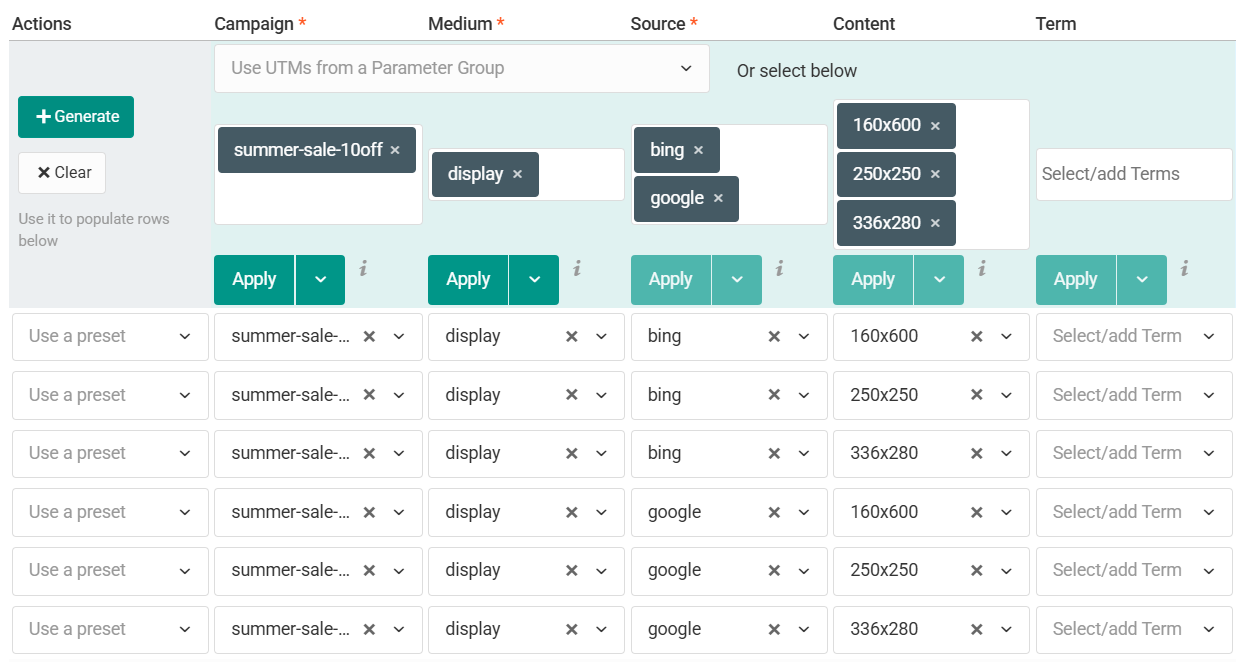
Click the + Generate button. The grid will populate with new rows for every possible combination (e.g., google_display, bing_display).
Workflow 3: Edit Manually or in Bulk
You can always edit your data after it's in the grid.
Manual Entry
- Click any cell to type in or change a value, just like in a spreadsheet.
Bulk Editing (Apply)
The Control Row can also be used to edit all rows below it.
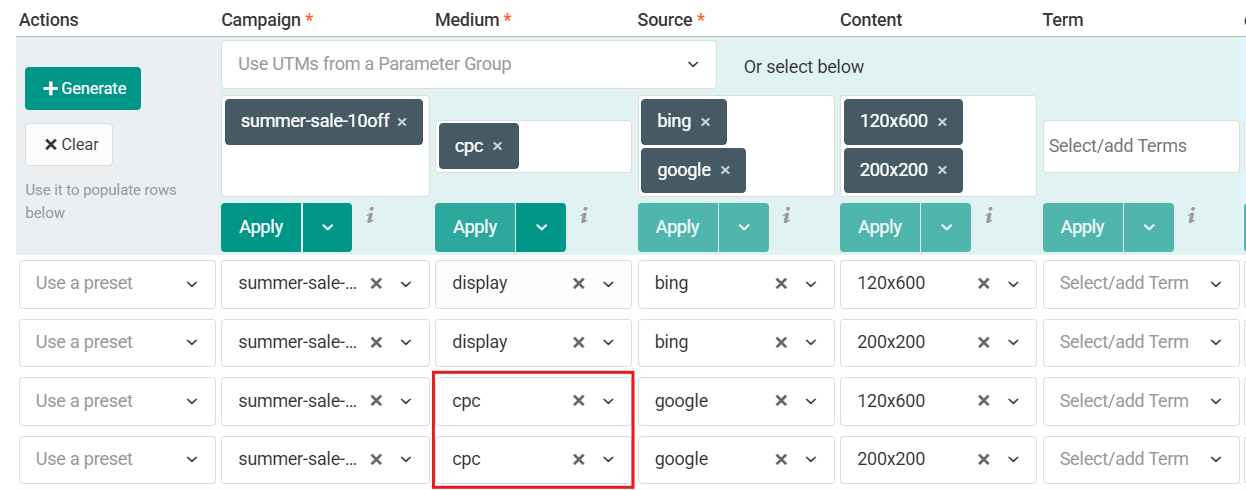
- To Fill Empty Cells: Enter a value in a Control Row cell (e.g., cpc in the Medium field) and click Apply. This will fill that value only in the empty cells for that column.
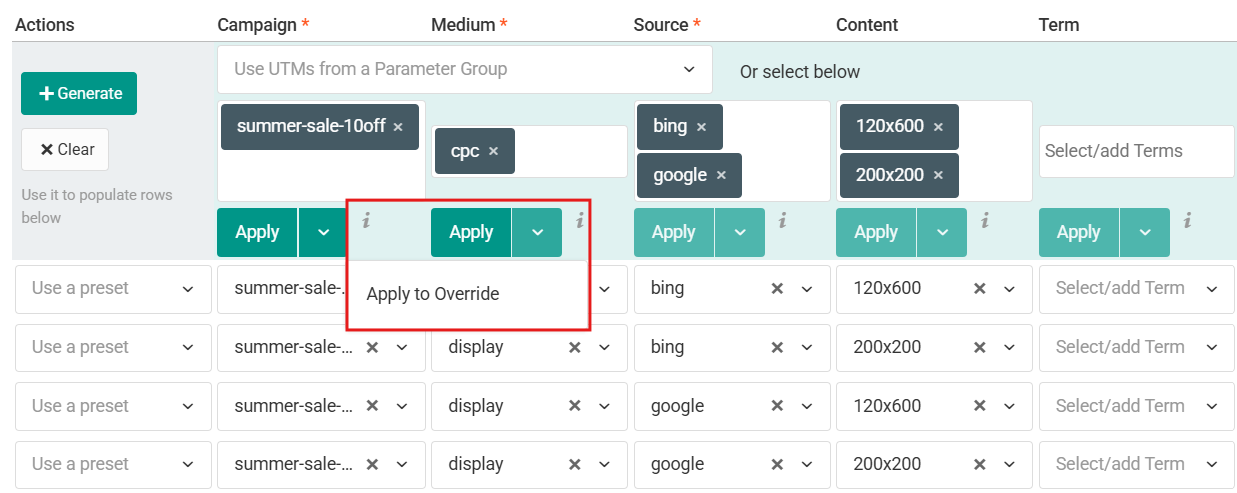
- To Overwrite All Cells: To force a change and replace all existing values, enter the new value in the Control Row, click the small dropdown arrow next to Apply, and select Apply to Override.
Step 4: Save Your URLs
Once the grid is populated with all the tag combinations you need, click the Save button.
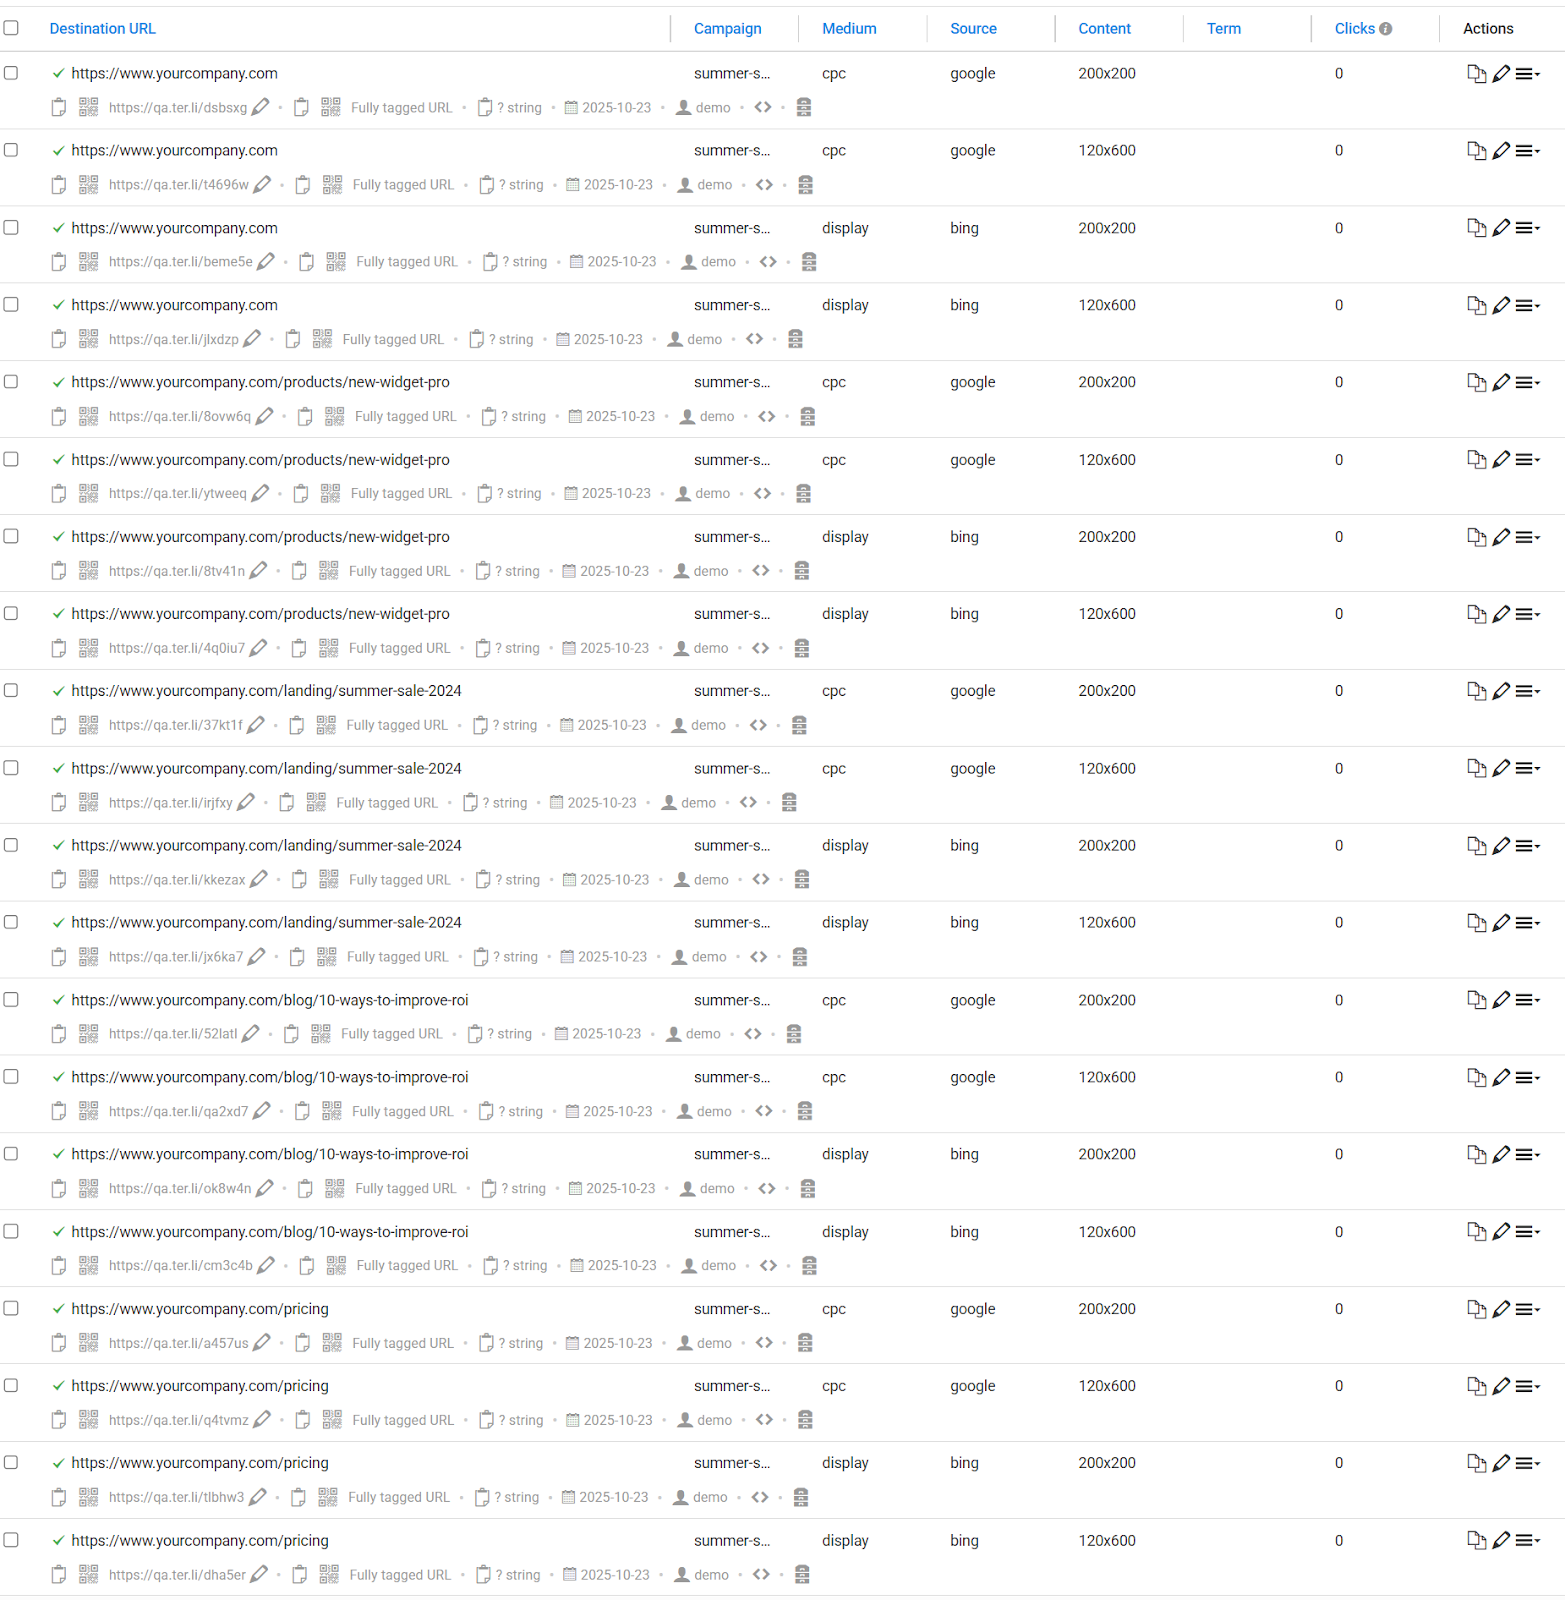
The platform will create a new, unique tracking URL for every row in the grid, applied to every Destination URL you listed in Step 2.
Tips and Best Practices
- Combine Workflows: This tool is highly flexible. A common workflow is to load a Preset Group (Workflow 1) and then use the Apply to all function (Workflow 3) to set the same UTM Campaign for all of them at once.
- Multi-Tag vs. Grid Mode: This builder is excellent for fast, flexible combination generation. If your bulk creation needs to be strictly enforced by a Convention, you may want to use the Grid Mode Builder instead.